Chat Room Admin
|
| What is it used for? | |
| Chat Administration allows you to add one or more chat
rooms to your site and control access to your rooms. You can
add public, restricted
and protected chat rooms. You can also set up
a list of protected users and grant them permission
to enter certain protected room(s). Examples would be to offer memberships
in an online club or to sell access to special online chat events.
Instructions and a URL (Web address) are provided for each room that your create, so that you can link to the room from any page of your Web site. Existing rooms of each type, if any, are listed on the main Chat Administration
page for your convenience. In the following example, there are several
rooms of each type already created: 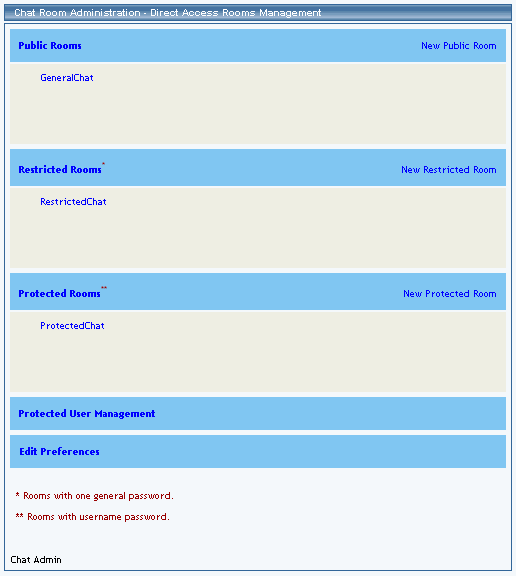
Back to the Top of the Page |
|
| How do I use it? | |
You use the links on the main Chat Administration page to access
room management and other chat settings for your Web site. From the main
administration page, you can:
Back to How Do I Use It Back to the Top of the Page Add Public (Direct Access) Chat Room: 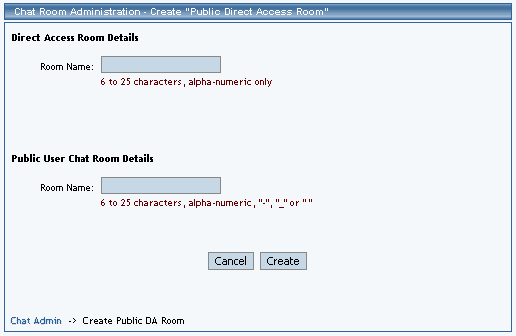
Add Restricted Direct Access Chat Room: 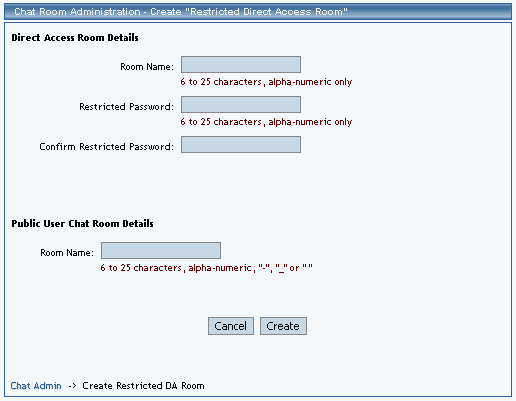
Add Protected Direct Access Chat Room: 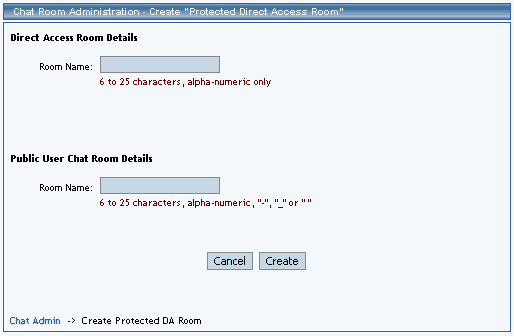
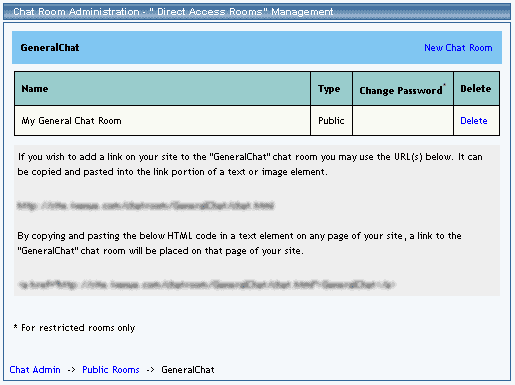
Edit, View or Delete a Public (Direct Access) Chat
Room: 
To set up a link to a room in the list, highlight the URL that is displayed for it, copy to clipboard, go to Site Administration, go to Site Modifier, select the page containing the text or image element that will serve as the link, edit that element, and paste the chat room's URL into the element's link option box. Optionally, set the link's Target to "_blank" if you wish to have the chat page open in a new window. Remember to click the button to submit or apply the changes and then update your site. You may also add a new public chat room from the Public Rooms main page, by scrolling to the bottom of the page and clicking the "Click here to create new public direct access room" link. To delete the room, simply click the "Delete" link to its right, then click the button to confirm the deletion. To edit the room, click the "Edit" link to the right of its name. The
following edit page will appear: 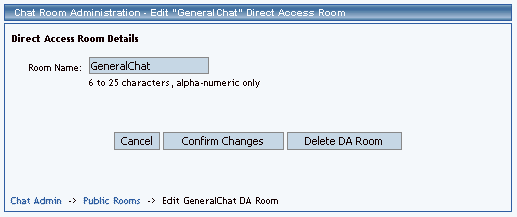
In the "Public User Chat Room Details" area, use the "Room Name" text
box to enter the new name that will appear in the list of your Web site's
chat rooms. Click the "Confirm Changes" button to update the room with
the new information that you entered, or click the "Cancel" button to
exit the edit page without saving your changes. (You may also delete the
room from this page, by clicking the "Delete DA Room" button and then
clicking the button to confirm the deletion.)
Edit, View or Delete a Restricted Direct Access
Chat Room: 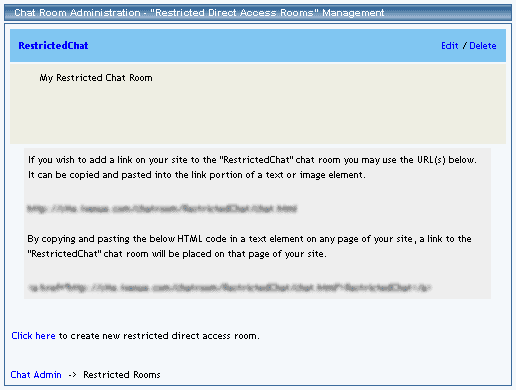
To set up a link to a room in the list, highlight the URL that is displayed for it, copy to clipboard, go to Site Administration, go to Site Modifier, select the page containing the text or image element that will serve as the link, edit that element, and paste the chat room's URL into the element's link option box. Optionally, set the link's Target to "_blank" if you wish to have the chat page open in a new window. Remember to click the button to submit or apply the changes and then update your site. You may also add a new restricted chat room from the "Restricted Rooms" main page, by scrolling to the bottom of the page and clicking the "Click here to create new restricted direct access room" link. To delete the room, simply click the "Delete" link to its right, then click the button to confirm the deletion. To edit the room, click the "Edit" link to the right of its name. The
following edit page will appear: 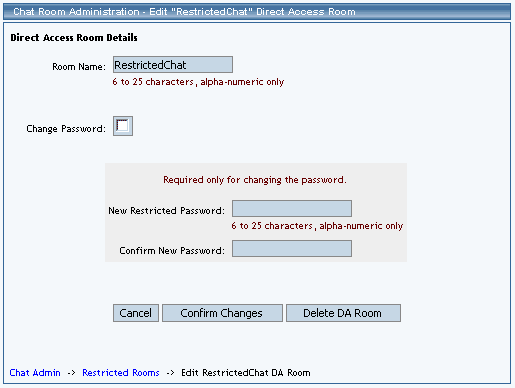
In the "Direct Access Room Details" section, use the "Room Name" text box to enter the new name that will appear while the visitor is in the room. To change the room's password, click the checkbox labeled "Change Password", enter the new password in the "New Restricted Password" box, and enter it again in the "Confirm New Password" box. Click the "Confirm Changes" button to update the room with the new information
that you entered, or click the "Cancel" button to exit the edit page without
saving your changes. (You may also delete the room from this page, by
clicking the "Delete DA Room" button and then clicking the button to confirm
the deletion.)
Edit, View or Delete a Protected Direct Access Chat
Room: 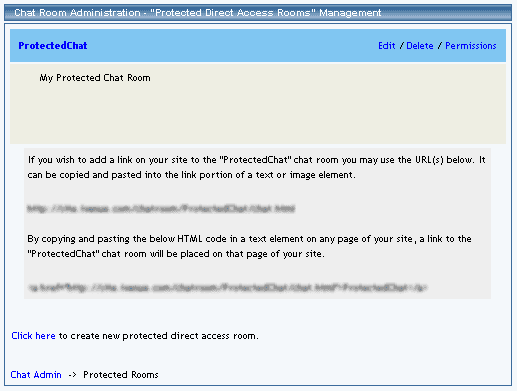
To set up a link to a room in the list, highlight the URL that is displayed for it, copy to clipboard, go to Site Administration, go to Site Modifier, select the page containing the text or image element that will serve as the link, edit that element, and paste the chat room's URL into the element's link option box. Optionally, set the link's Target to "_blank" if you wish to have the chat page open in a new window. Remember to click the button to submit or apply the changes and then update your site. You may also add a new protected chat room from the "Protected Rooms" main page, by scrolling to the bottom of the page and clicking the "Click here to create new protected direct access room" link. To delete the room, simply click the "Delete" link to its right, then click the button to confirm the deletion. To edit the room's list of permitted users, click the "Permissions" link to its right. How to edit permissions To edit the room, click the "Edit" link to the right of its name. The
following edit page will appear: 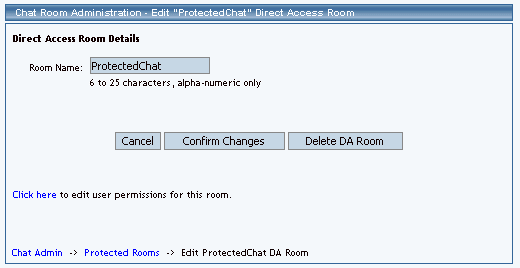
In the "Direct Access Room Details" section, use the "Room Name" text box to enter the new name that will appear while the visitor is in the room. Click the "Confirm Changes" button to update the room with the new information that you entered, or click the "Cancel" button to exit the edit page without saving your changes. To delete the room, click the "Delete DA Room" button and then click the button to confirm the deletion. You can edit the room's permission list from this page, by clicking the "Click here to edit user permissions for this room" link.
You use the Edit Permissions page to control who
is permitted to enter the protected chat room. All of your protected users
are listed according to their current status for that room, "permitted"
or "not permitted": 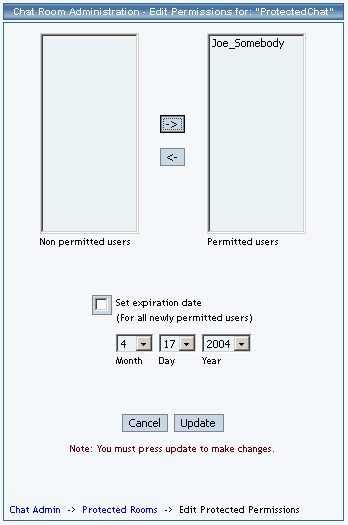
To change a user from "not permitted" to "permitted", highlight the user's name in the box on the left and click the arrow that points to the box on the right. To change a user from "permitted" to "not permitted", highlight the user's name in the box on the right and click the arrow that points to the box on the left. You may set an ending date for the permissions, by clicking the checkbox labeled "Set expiration date". Adjust the date as needed by using the Month, Day and Year dropdown menus to select the desired values. Click the "Update" button to confirm your changes, or click "Cancel"
to exit the Edit Permissions page without saving your changes. (You may
also assign room permissions to a particular user while adding
or editing that user.)
Add or Edit Protected Chat Users: 
To add a new protected user, click "Create New Protected
User". The following page will appear: 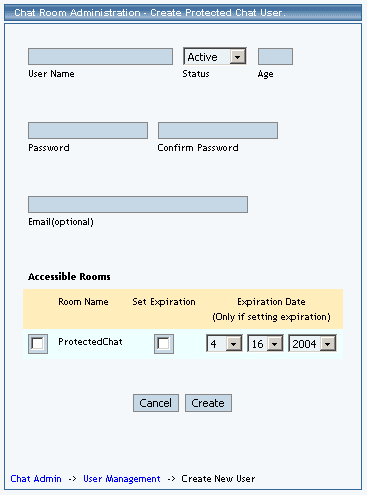
Enter the new user's name, age and password. You must enter the password twice to confirm that you have typed it as intended. If you wish, change the new user's status from "Active" to "Inactive". Click the checkbox to the left of each protected room which the new user will have permission to enter. If you wish, specify an end date for the permission. To edit, deactivate or remove a protected user from your site list,
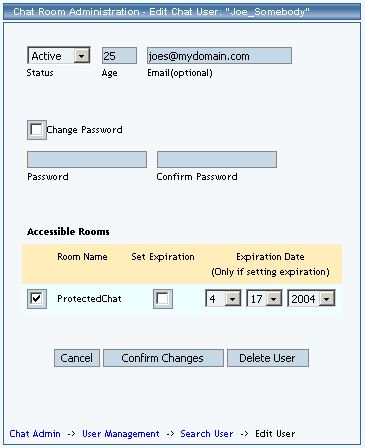
click "Edit Existing Protected User". The following page will appear:
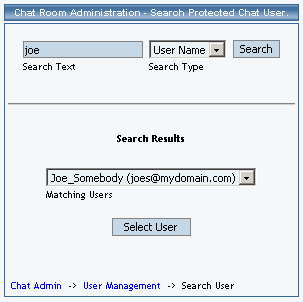
Enter all or part of the username or email address, indicate if you
want to search by username or email address, and then click "Search".
A page such as the following page will appear: 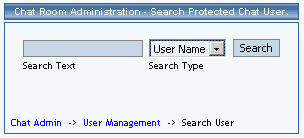
Find the user you wish to modify in the search result's dropdown menu,
then click "Select". The following page will appear: 
Change the user's name, age and password as necessary. Note that you must click the checkbox to indicate that you are changing the password. Enter the new password twice to confirm that you have typed it as intended. You may change the new user's status via the "Status" dropdown menu. To change the user's protected room permissions, click the checkbox to the left of each protected room so that it is checked or unchecked, to permit or not permit the user to enter that room. If you wish, specify an end date for each permission via the Month, Day and Year dropdown menus; click the "Set expiration" checkbox. Click the "Confirm Changes" button to update the user with the new information that you entered, or click the "Cancel" button to exit the edit page without saving your changes. To delete the user, click the "Delete User" button and click as required
to confirm the deletion.
Set Chat Preferences: 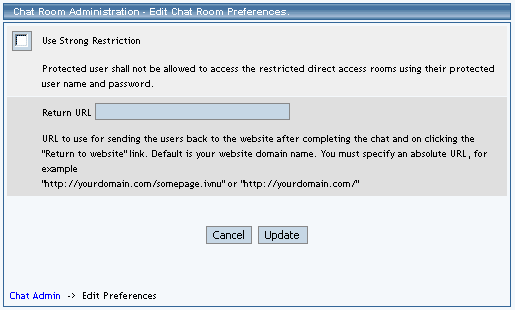
If the checkbox labeled "Use Strong Restriction" is unchecked, protected
users will be allowed to enter restricted chat rooms by using their own
login information. To require them to use the restricted room's password
like normal (non-protected) chat users, click the checkbox so that it
is checked. To save your new preference, click the "Update" button; to
exit the preferences page without saving your changes, click the "Cancel"
button. |
|
| Definitions | |
|
Public chat
rooms do not require use of a password to enter the room. As
for all types of rooms, the visitor's chat name and age are required to
enter. Your Web site's chat rooms are automatically restricted to visitors
18 years of age or older. The chat name can by anything the visitor chooses,
as long as it is not in use currently. You can change the name of the
room at any time by editing the public chat room.
Back to Definitions Back to the Top of the Page
Restricted
chat rooms require use of a password to enter, as well as chat
name and age. You assign a password to each of your restricted chat rooms,
change the name of the room, and change the room's password at any time,
by editing the restricted chat room.
Back to Definitions Back to the Top of the Page
Unlike restricted rooms which have
their own passwords, protected chat rooms
are accessible only to certain "protected users" whom you have given permission
to enter. You can change a protected room's permission list of users,
rename the name of the room, etc. by editing the protected
room.
Back to Definitions Back to the Top of the Page Protected chat users
are those individuals whom you have identified as authorized to enter
the protected room(s) to which you assign them. You assign each user in
your protected user list a username and a password which that user will
use to enter. You can add and delete protected users from your Web site's
protected user list or change a user's username and password via Protected
User Management. Back to the Top of the Page |
|
| Related links | |
|
Chat Administration Overview |
