How to Set Up Mozilla Thunderbird 1.5 to Send and Receive Email
  • Operating System(s): Windows XP
  • Application: Mozilla Thunderbird 1.5
Follow the steps below to set up Mozilla Thunderbird 1.5 to send and receive email.
How to Set Up Mozilla Thunderbird 1.5 to Send and Receive Email

How to Use Mozilla Thunderbird 1.5 to Send and Receive Email

Incoming/Outgoing Server Setup

The following tutorial has been set up using Thunderbird version 1.5. Setting up Thunderbird is a little more complex than some other clients, and the procedure has been divided into 2 sections.

Add new Account wizard

  1. Launch Thunderbird.  If the Account Wizard comes up, cancel it.
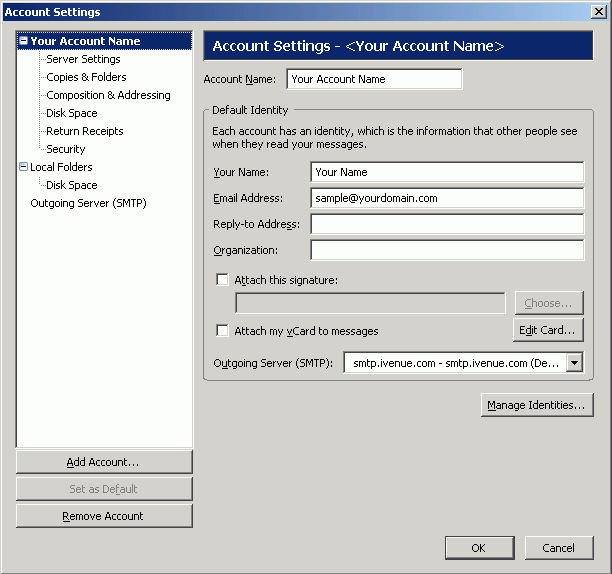
  2. Select 'Account settings' from the 'Tools' menu.

  3. Click the 'Add Account...' button near the lower left of the panel. This brings up the 'Account Wizard' shown below. Ensure 'Email account' is checked and then click 'Next'

  4. On the 'Identity' panel, enter the name you want displayed when recipients receive email from you. Enter your email address in the lower field. Click 'Next'
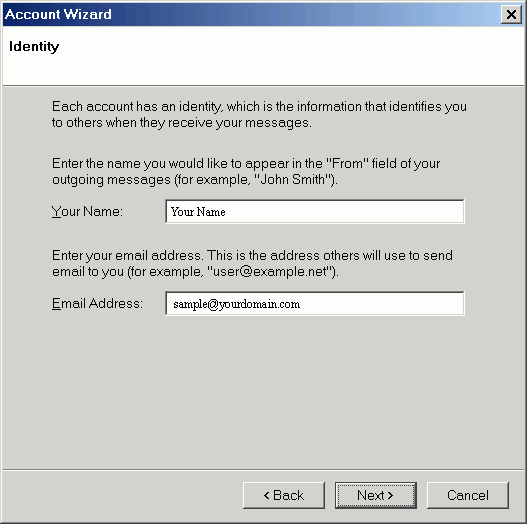
    Account Wizard: Identity

  5. In the 'Server Information' panel, check the 'POP' radio button. Enter 'pop3.ivenue.com' in the 'Incoming Server' field and enter smtp.ivenue.com' in the 'Outgoing Server' field.
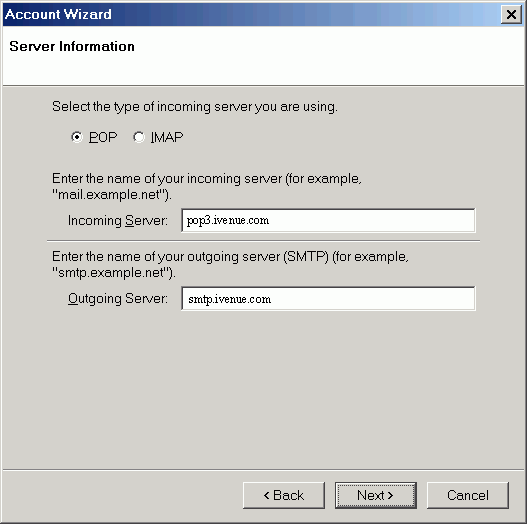
    Account Wizard: Server Information

  6. Enter your e-mail address. Click 'Next'

  7. Enter a descriptive name that Thunderbird will use to identify this account to you. Click 'Next>'

  8. Verify all the details are correct, and check the box for Download Messages Now. If you got something wrong, use the 'Back' button to return to that setting and keep clicking 'Next' until you're back at this panel.

    Click 'Finish' to return back to the main settings panel.

  9. You will be prompted to enter your password

  10. If you plan on using both Thunderbird and webmail to access your e-mail, return to 'Tools > Account Settings'.  In the window that comes up, click 'Server Settings'.  Check the box for 'Leave messages on server'.
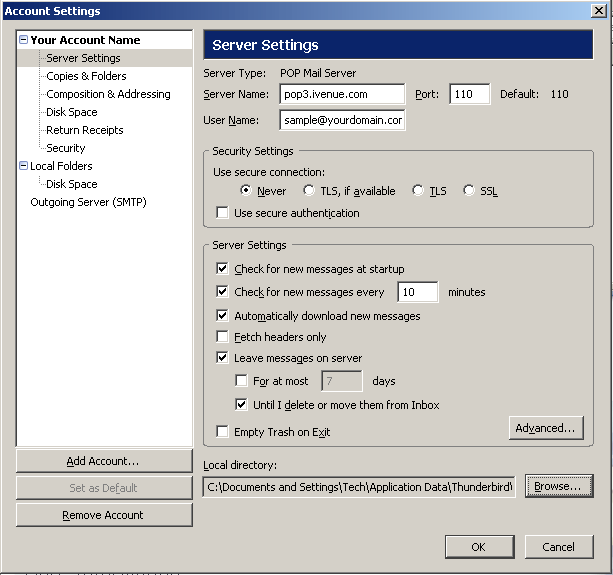
    Click 'OK' on the settings panel to return to the main Thunderbird screen.
Back to Top

Outgoing Server (SMTP) issues

The way Thunderbird handles multiple accounts and multiple SMTP servers can be confusing to say the least. Remember when you specified a server in the 'Outgoing Server:' field of the 'Account setup wizard'? Well, that information is permanently set with that account. If you have a problem with outgoing mail or you already have an outgoing SMTP server setup, then you need to do 2 things:

  1. Using the information provided during the account setup there will already be a default smtp server setup for you.

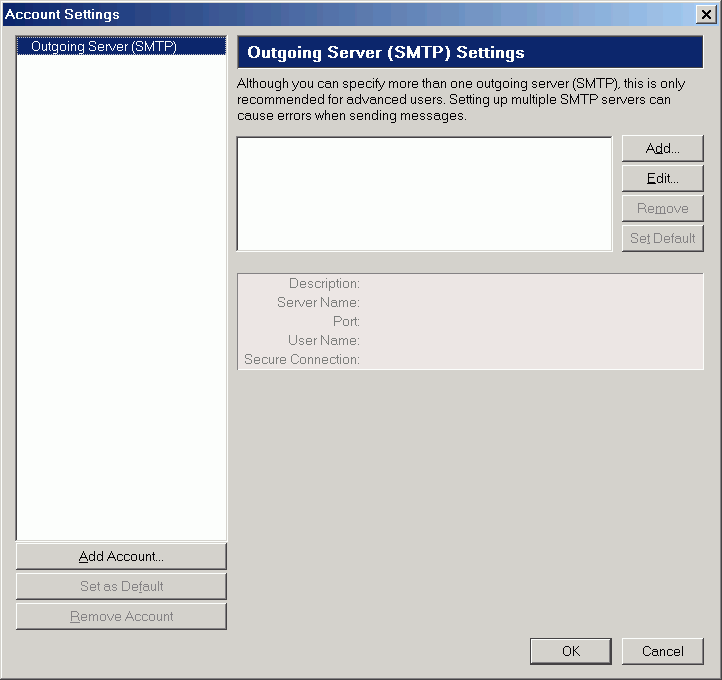
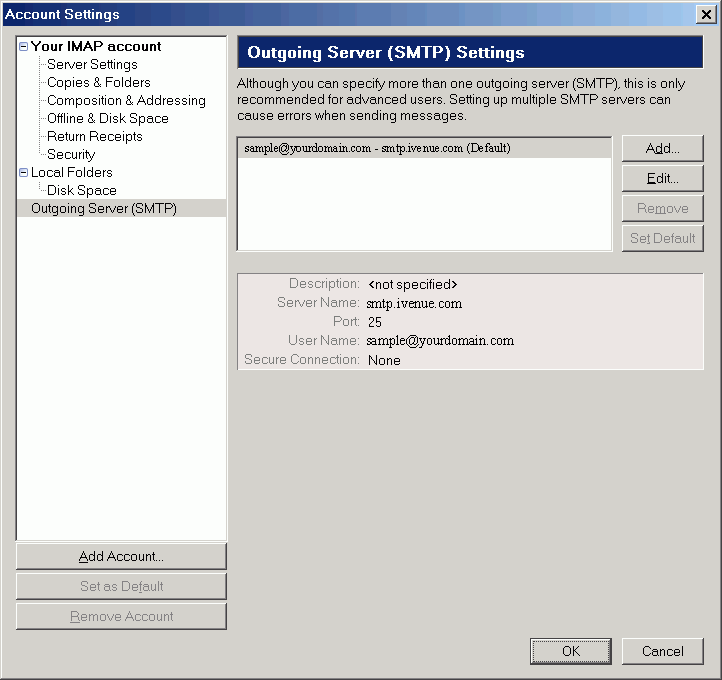
    Select 'Account settings' from the 'Tools' menu and click on 'Outgoing Server (SMTP)' to open the dialog shown below.

    Outgoing server settings

    Select the 'smtp.ivenue.com' entry and click 'Edit' to setup your default outgoing mail server (which may be used by any account you register with Thunderbird) as shown below.

    The description field can be set to anything you like to identify the account.

    Enter "587" in the box next to "Port:" (Check your firewall settings if necessary to enable that port).

    You must explicitly check the 'Use name and password' box and put your webmail address in the 'User name:' field. You will get a strange error when sending emails if you don't do this.

  2. The other thing you need to do is to point your new webmail profile to the default outgoing server you just set up.

    Bring up your account settings and select 'smtp.ivenue.com' in the drop box at the bottom.

    Click 'OK' to finish.